VLANs on Mikrotik
MikroTik VLAN configuration allows you to efficiently segment your network, improve security, and manage traffic flow without the need for additional physical infrastructure.
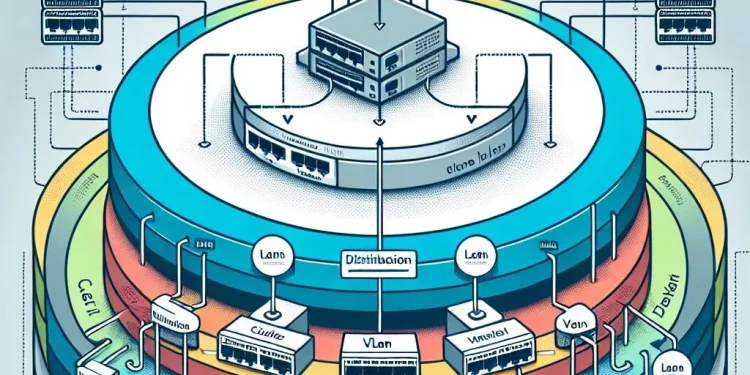
Virtual Local Area Networks (VLANs) allow you to logically segment a network into multiple isolated networks without requiring separate physical switches. VLANs help improve security, reduce network congestion, and enhance manageability by grouping devices based on function, department, or security needs.
What are VLANs?
A VLAN, or Virtual Local Area Network, is a way to divide a physical network into multiple smaller, isolated networks. Instead of grouping devices based on where they’re physically connected, you can group them logically. This means computers, printers, or servers in different rooms — or even on different switches — can still communicate as if they’re part of the same local network.
Each VLAN gets a VLAN ID (a number between 1 and 4094) that tags the traffic. These tags help the router or switch understand which VLAN the data belongs to and where to deliver it. For example, a VLAN ID of 10 might represent your office computers, while VLAN 20 handles guest Wi-Fi.
With this setup, devices in one VLAN can’t reach devices in another VLAN unless you specifically allow it. This improves security, reduces unnecessary network traffic, and keeps everything more organized — especially in larger networks.
For example, you can create:
- VLAN 10 for management devices
- VLAN 20 for employees
- VLAN 30 for guests
Devices in different VLANs cannot communicate directly unless you configure routing between them.
How VLANs Work (Tagged vs. Untagged Traffic)
VLANs use IEEE 802.1Q tagging, a protocol that adds a VLAN tag to Ethernet frames to indicate which VLAN the traffic belongs to.
- Tagged Traffic (Trunk Ports):
- When traffic moves between switches or VLAN-aware devices, it carries a VLAN tag.
- Trunk ports are configured to carry multiple VLANs.
- Example: A switch uplink carrying VLAN 10, 20, and 30.
- Untagged Traffic (Access Ports):
- End devices (like PCs or printers) are usually unaware of VLANs.
- Access ports remove VLAN tags before forwarding traffic to end devices.
- Each access port belongs to a single VLAN.
Why Use VLANs?
1. Network Segmentation
VLANs allow you to separate network traffic logically. Instead of using multiple physical switches, VLANs let you create separate networks within the same switch.
Example: You can isolate guest Wi-Fi from the internal company network, preventing unauthorized access.
2. Improved Security
By restricting communication between different VLANs, you reduce the risk of unauthorized access. Only specific devices or users can interact based on network rules.
Example: Placing IoT devices in a separate VLAN protects them from accessing sensitive business resources.
3. Reduced Broadcast Traffic
By default, switches flood broadcast packets to all devices. VLANs minimize broadcast domains, reducing unnecessary traffic and improving network performance.
Example: A 100-user office using VLANs prevents broadcast traffic from reaching all devices, improving efficiency.
4. Easier Network Management
VLANs make it easier to manage and scale networks. Instead of rewiring hardware, you can create logical divisions using software-based configurations.
Example: If a company expands, new departments can be assigned to VLANs without reconfiguring the entire network.
MikroTik VLAN Configuration
Now that you understand VLANs, let’s configure them on a MikroTik router.
Step 1: Accessing Your MikroTik Router
You can access your MikroTik router using:
- WinBox (GUI-based tool)
- SSH or Telnet (Command-line access)
- WebFig (Web-based interface in case that this service is enabled)
For CLI access, connect via SSH and log in:
ssh admin@192.168.88.1Step 2: Creating VLAN Interfaces (CLI and with WinBox)
To create VLANs, add a VLAN interface to the appropriate physical port:
/interface vlan
add name=ether2-vlan10 vlan-id=10 interface=ether2
add name=ether3-vlan20 vlan-id=20 interface=ether3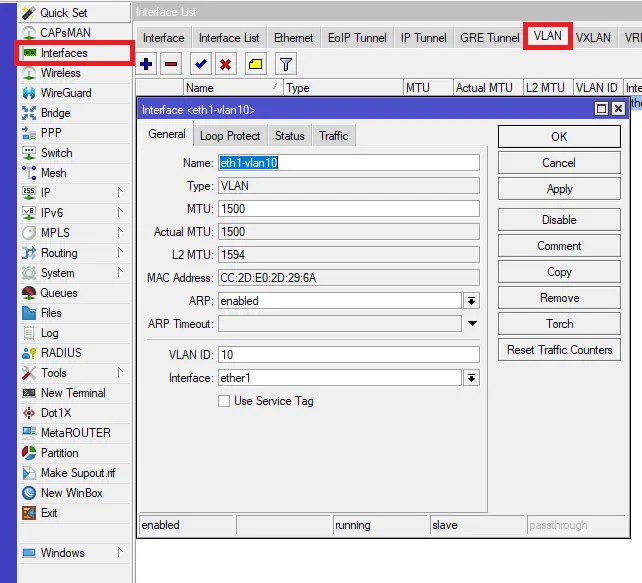
Step 3: Setting up VLAN Tagging (Trunk Port)
A trunk port carries multiple VLANs and is typically used between switches or to a VLAN-aware router.
interface bridge
add name=bridge-defencedev vlan-filtering=yes

/interface bridge port
add bridge=bridge-defencedev interface=ether4 frame-types=admit-only-vlan-tagged
add bridge=bridge-defencedev interface=ether5 frame-types=admit-only-vlan-tagged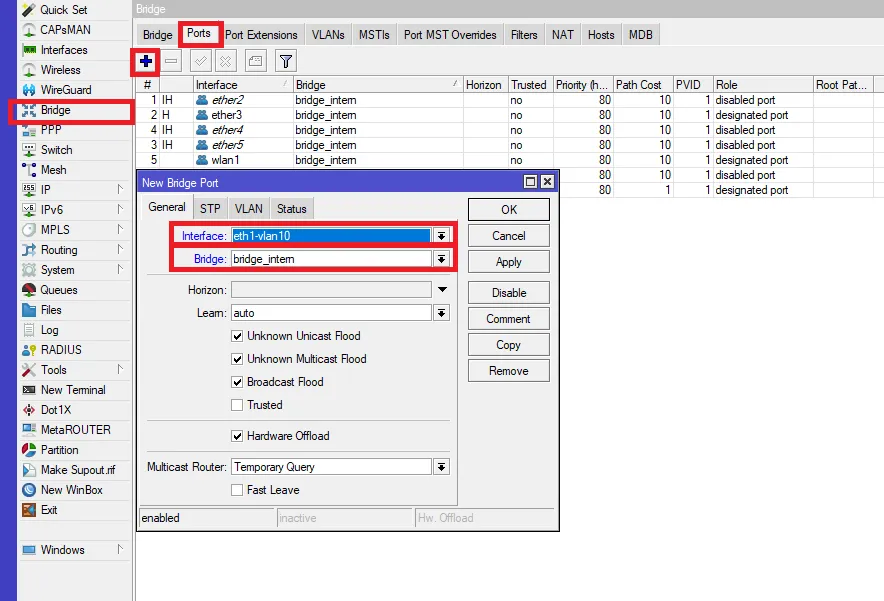
Step 4: Configuring Access Ports (Untagged VLANs)
Access ports connect to end devices and must be assigned a specific VLAN.
/interface bridge port
add bridge=bridge-defencedev interface=ether3 pvid=10
add bridge=bridge-defencedev interface=ether4 pvid=20
Step 5: Creating a Bridge with VLANs
To ensure VLAN communication works properly, create VLAN filtering rules in the bridge:
/interface bridge vlan
add bridge=bridge-defencedev vlan-ids=10 tagged=ether1 untagged=ether3
add bridge=bridge-defencedev vlan-ids=20 tagged=ether1 untagged=ether4
This ensures VLAN 10 is untagged on ether3 and VLAN 20 is untagged on ether4, while ether1 carries both VLANs as tagged traffic.
Step 6: Assigning IP Addresses to VLANs
For VLANs to communicate, assign IP addresses to each VLAN interface:
/ip address
add address=192.168.10.1/24 interface=ether1-vlan10
add address=192.168.20.1/24 interface=ether2-vlan20
Now, VLAN 10 devices use 192.168.10.1 as their gateway, and VLAN 20 devices use 192.168.20.1.
You can also assing IP Address to the bridge interface.
Step 7: Testing Connectivity
After configuring VLANs, test connectivity using ping from devices in different VLANs.
For example, a computer in VLAN 10 can ping the MikroTik VLAN 10 gateway:
ping 192.168.10.1To allow VLANs to communicate, enable inter-VLAN routing or configure firewall rules to restrict traffic between VLANs as needed.


