• Contact
  • About Me
  • Privacy Policy
DefenceDev
  • Home
  • Blog
  • Linux Tutorials
    • Bash Scripting Lessons
    • Commands
    • Networking
  • Solutions
    • Docker
  • Network Tutorials
    • FortiGate
    • MikroTik
  • Projects
    • AdGuard
    • Immich
    • Nextcloud
    • WordPress
  • Cloud
  • Video Tutorials
    • YouTube Channel
    • MikroTik Videos
No Result
View All Result
DefenceDev
No Result
View All Result
ADVERTISEMENT
Home Projects AdGuard

AdGuard Home: Install DNS Server on Ubuntu and Configure It

neo by neo
May 27, 2025
in AdGuard
0
AdGuard Home: Install DNS Server on Ubuntu and Configure It

AdGuard Home: Install DNS Server on Ubuntu and Configure It

0
SHARES
291
VIEWS
Share on FacebookShare on Twitter
ADVERTISEMENT

Introduction

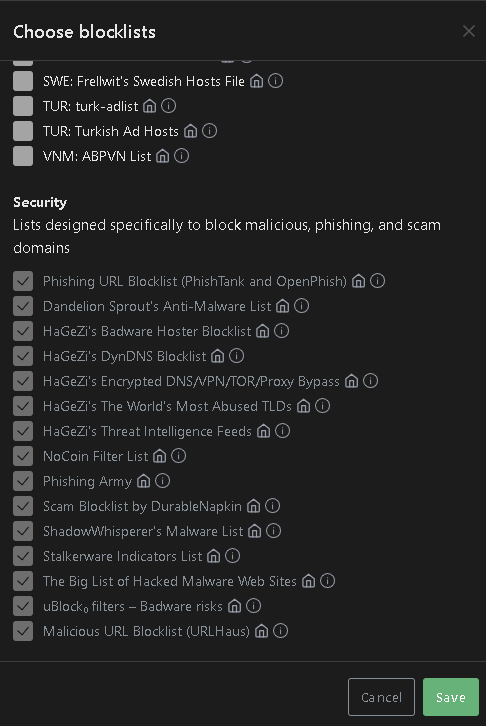
In this article, we will walk through the installation of AdGuard Home DNS Server on Ubuntu 22.04 and the configuration process. I choose this DNS Server running on Ubuntu to protect my network from malicious, phishing, and scam domains.

AdGuard Security Blocklist

The Domain Name System (DNS) is a fundamental component of the Internet and your local network that translates human-readable domain names into IP addresses. It acts like a phone book for the Internet, helping computers and network devices find and communicate with each other.

At this link you can check Git Repository related to the AdGuard Home.

Requirements for AdGuard Running on Ubuntu

In my environment, the AdGuard Home DNS Server is installed on a Virtual Machine with:

  • Ubuntu 22.04
  • RAM: 2 GB
  • CPU: 1 Processor
  • HDD: 20 GB

There are between 20–60 devices on this network using this DNS server, and I haven’t noticed any lag or issues.

I was not able to find official requiremnts for AdGuard Home

Steps to Install AdGuard Home DNS Server

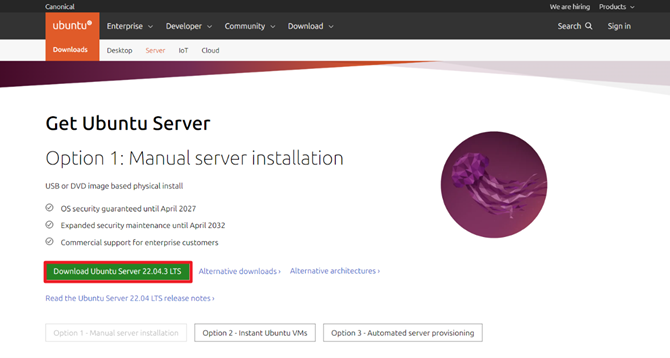
Step 1: Install Ubuntu 22.04 Server and Update It

Before installing AdGuard Home, update your system to ensure all packages are up-to-date.

sudo apt update && sudo apt upgrade -y

Step 2: Set Static IP for Your Ubuntu Server

Configure a static IP address on your server. Below is an example of how to do this with Netplan.

nano /etc/netplan/00-installer-config.yaml 

# This is the network config written by 'subiquity'
network:
  ethernets:
    ens160:
      addresses:
      - 192.168.10.201/24
      gateway4: 192.168.10.253
      nameservers:
        addresses:
        - 8.8.8.8
        search: []
  version: 2
netplan apply 

If you need more examples of Netplan configuration you can check my article abut it.

Step 3: Install AdGuard Home on Ubuntu 22.04

In this case AdGuard will be downloaded in /opt directory and the install script

ADVERTISEMENT
cd /opt

# Download application
curl -s -S -L https://raw.githubusercontent.com/AdguardTeam/AdGuardHome/master/scripts/install.sh | sh -s -- -v

Output of the installation will be something like:

******                   .
AdGuard Home is now available at the following addresses:
2024/11/30 07:22:47 [info] go to http://127.0.0.1:3000
2024/11/30 07:22:47 [info] go to http://[::1]:3000
2024/11/30 07:22:47 [info] go to http://192.168.10.201:3000

2024/11/30 07:22:47 [info] service: action install has been done successfully on                                                   linux-systemd
AdGuard Home is now installed and running
you can control the service status with the following commands:
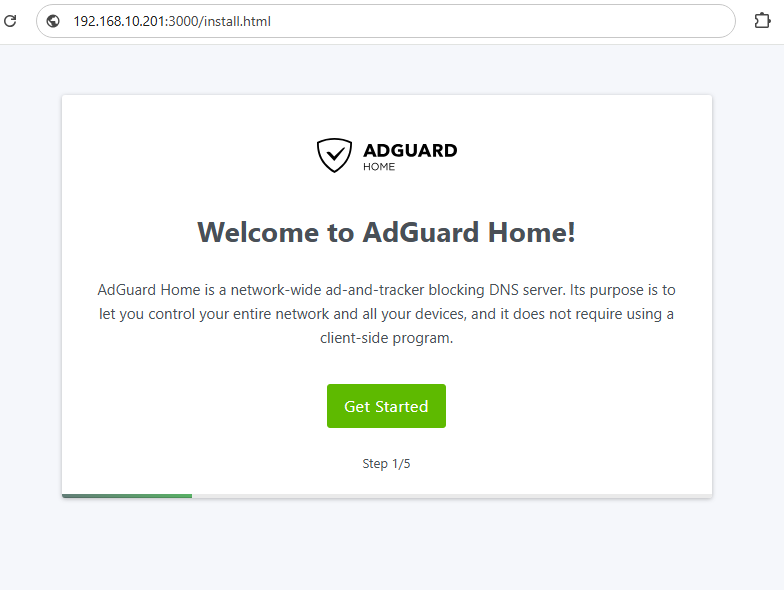
sudo /opt/AdGuardHome/AdGuardHome -s start|stop|restart|status|install|uninstall

Step 4: Continue AdGuard Setup in the Web Browser

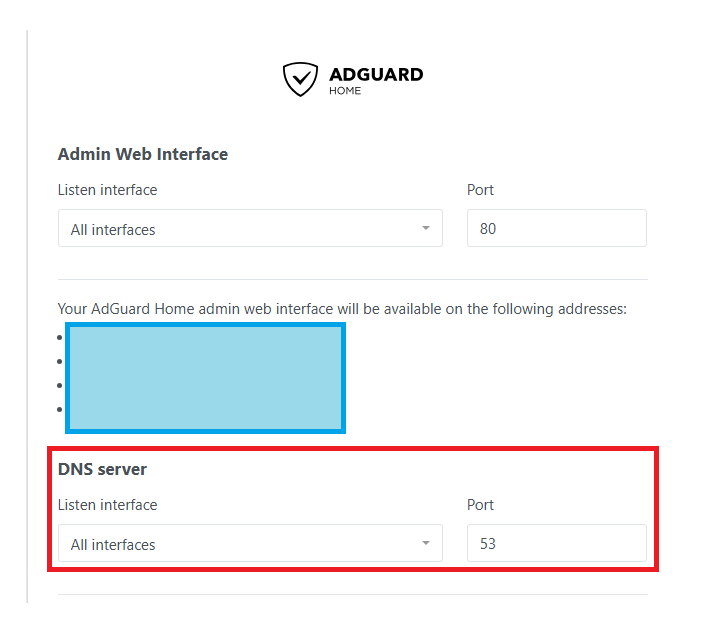
Open the link (in my case 192.168.10.201:3000/install.html) in your browser and follow the configuration wizard:

ADVERTISEMENT
AdGuard Home Setup from web browser
AdGuard Home, Bind Address in Use Error

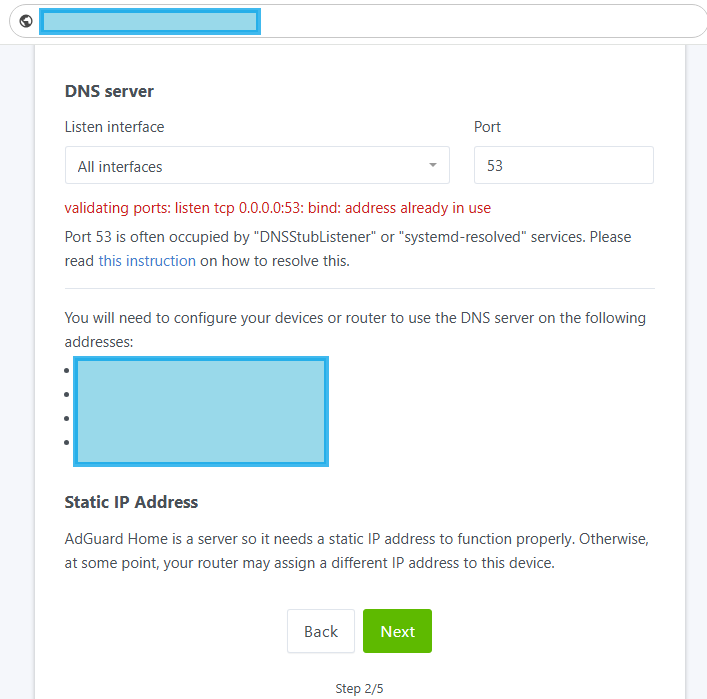
We need to fix the issue rleated to the Port 53 usage on the server. We can use suggested fix by AdGuard Support Page.

Step 5: Troubleshooting DNS Activity – Bind Address in Use Error

Connect to the Ubuntu Server and check DNS Activity to be sure that there is no other service using the port 53:

ADVERTISEMENT
# Check activity on Port 53
sudo lsof -i :53
Chek DNS Activity with the command sudo lsof -i :53
Check DNS Activity with the command sudo lsof -i :53

Step 5.1: Create the /etc/systemd/resolved.conf.d directory

sudo mkdir -p /etc/systemd/resolved.conf.d

Step 5.2: Deactivate DNSStubListener and update DNS server address.

Create a new file, /etc/systemd/resolved.conf.d/adguardhome.conf

sudo nano /etc/systemd/resolved.conf.d/adguardhome.conf
# Content of the file
[Resolve]
DNS=127.0.0.1
DNSStubListener=no

5.3 Activate another resolv.conf file:

# Activate resolv.conf file:

sudo mv /etc/resolv.conf /etc/resolv.conf.backup
sudo ln -s /run/systemd/resolve/resolv.conf /etc/resolv.conf

5.4 Restart DNSStubListener:

# Restart DNSStubListener:
sudo systemctl reload-or-restart systemd-resolved

5.5 Start your AdGuard Home Installation Process Again

After refreshing your browser, the error message regarding the “connection “Bind address in use” should disappear.

AdGuard Home FIxed Bind Address in use Issue

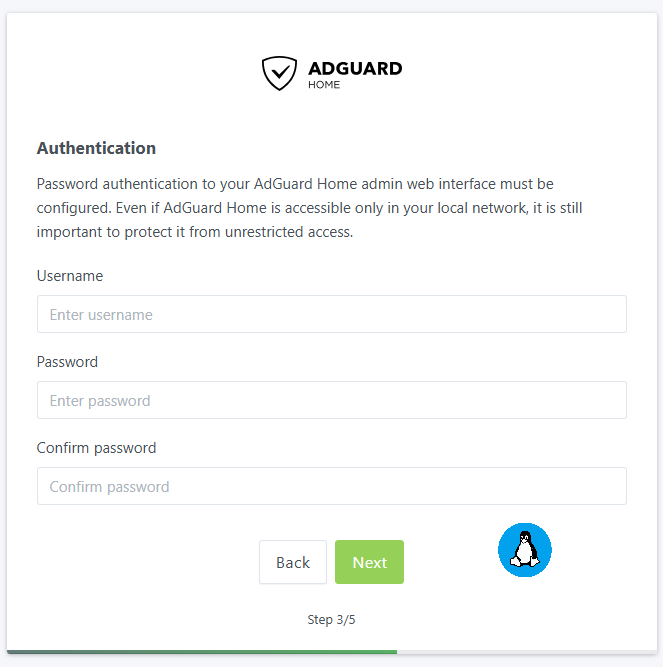
Step 6: Configure Your Username and Password for AdGuard Web Admin Login

Set your username and password that will be used to access the server:

AdGuard Home Setup User Access

With this setup, installation and configuration process is completed.

About The Author

neo

See author's posts

Tags: adguard
ADVERTISEMENT
Previous Post

Nextcloud: Change – Replace Hard Drive for the Data on Ubuntu

Next Post

Immich: Installation on Ubuntu 22.04

neo

neo

Next Post
Immich: Installation on Ubuntu 22.04

Immich: Installation on Ubuntu 22.04

Follow Us

  • Trending
  • Comments
  • Latest
MikroTik: Export Configuration in Text File

MikroTik: Export Configuration in Text File

Fortinet FortiGate: Static Route Configuration via GUI and CLI

Fortinet FortiGate: Static Route Configuration via GUI and CLI

Immich: Installation on Ubuntu 22.04

Immich: Installation on Ubuntu 22.04

Fortinet FortiGate Upgrade Path Tool

Fortinet FortiGate Upgrade Path Tool

NextCloud: Port Forwarding - Essential Ports for Smooth Functionality

NextCloud: Port Forwarding – Essential Ports for Smooth Functionality and Remote Access

Organizing and Managing Photos with Immich: Features I Use

Organizing and Managing Photos with Immich: Features I Use

Install Ubuntu 22.04 on Oracle VM Virtual Box

Install Ubuntu 22.04 on Oracle VM Virtual Box

Linux Directories: cd (Change Directory), pwd (Print Working Directory), mkdir (Make Directory)

Linux Directories: cd (Change Directory), pwd (Print Working Directory), mkdir (Make Directory)

Install WordPress on Raspberry Pi 4 with Docker (Ubuntu 22.04)

Install WordPress on Raspberry Pi 4 with Docker (Ubuntu 22.04)

Install Nextcloud on Raspberry Pi 4 with Docker (Ubuntu 22.04)

Install Nextcloud on Raspberry Pi 4 with Docker (Ubuntu 22.04)

Install Nginx Proxy Manager on Raspberry Pi 4 with Docker (Ubuntu 22.04)

Install Nginx Proxy Manager on Raspberry Pi 4 with Docker (Ubuntu 22.04)

Install Docker on Raspberry Pi 4 with Ubuntu 22.04

Install Docker on Raspberry Pi 4 with Ubuntu 22.04

Recent News

Install WordPress on Raspberry Pi 4 with Docker (Ubuntu 22.04)

Install WordPress on Raspberry Pi 4 with Docker (Ubuntu 22.04)

Install Nextcloud on Raspberry Pi 4 with Docker (Ubuntu 22.04)

Install Nextcloud on Raspberry Pi 4 with Docker (Ubuntu 22.04)

Install Nginx Proxy Manager on Raspberry Pi 4 with Docker (Ubuntu 22.04)

Install Nginx Proxy Manager on Raspberry Pi 4 with Docker (Ubuntu 22.04)

Install Docker on Raspberry Pi 4 with Ubuntu 22.04

Install Docker on Raspberry Pi 4 with Ubuntu 22.04

MikroTik: Check Your Wireless Password

MikroTik: Check Your Wireless Password

ADVERTISEMENT

DefenceDev Tutorials

defencedev Logo

Whether you’re just starting or looking to expand your skills, I hope you find useful information and engaging discussions here. Let me take you through my journey and the goals behind this space!

Follow Us

Browse by Category

  • Blog
  • Cloud
    • Private
  • Linux Tutorials
    • Bash Scripting Tutorials
    • Commands
    • Networking
  • Network Tutorials
    • FortiGate
    • MikroTik
  • Projects
    • AdGuard
    • Immich
    • Nextcloud
    • WordPress
  • Solutions
    • Docker
  • Video Tutorials
    • MikroTik Videos

Recent News

Install WordPress on Raspberry Pi 4 with Docker (Ubuntu 22.04)

Install WordPress on Raspberry Pi 4 with Docker (Ubuntu 22.04)

Install Nextcloud on Raspberry Pi 4 with Docker (Ubuntu 22.04)

Install Nextcloud on Raspberry Pi 4 with Docker (Ubuntu 22.04)

  • Site Map
  • Privacy Policy
  • Facebook Page
  • Disclaimer
  • Contact
  • About Me

© 2025 defencedev.com - All rights reserved.

No Result
View All Result
  • Home
  • Blog
  • Linux Tutorials
    • Bash Scripting Lessons
    • Commands
    • Networking
  • Solutions
    • Docker
  • Network Tutorials
    • FortiGate
    • MikroTik
  • Projects
    • AdGuard
    • Immich
    • Nextcloud
    • WordPress
  • Cloud
  • Video Tutorials
    • YouTube Channel
    • MikroTik Videos

© 2025 defencedev.com - All rights reserved.