• Contact
  • About Me
  • Privacy Policy
DefenceDev
  • Home
  • Blog
  • Linux Tutorials
    • Bash Scripting Lessons
    • Commands
    • Networking
  • Solutions
    • Docker
  • Network Tutorials
    • FortiGate
    • MikroTik
  • Projects
    • AdGuard
    • Immich
    • Nextcloud
    • WordPress
  • Cloud
  • Video Tutorials
    • YouTube Channel
    • MikroTik Videos
No Result
View All Result
DefenceDev
No Result
View All Result
ADVERTISEMENT
Home Projects Nextcloud

Nextcloud: Manual Upgrade from 25.0 to 26.0 on Ubuntu 22.04

neo by neo
May 27, 2025
in Nextcloud
0
Nextcloud: Manual Upgrade from 25.0 to 26.0 on Ubuntu 22.04

Nextcloud: Manual Upgrade from 25.0 to 26.0 on Ubuntu 22.04

0
SHARES
42
VIEWS
Share on FacebookShare on Twitter
ADVERTISEMENT

NextCloud Manual Upgrade on Ubuntu 22.04

Nextcloud upgrade (manual or automatically via web update) ensures you benefit from the latest features, performance improvements, and enhanced security. This post walks you through the step-by-step process of upgrading Nextcloud from version 25.0 to 26.0 on an Ubuntu 22.04 server. Whether you’re managing a personal setup or a larger deployment, following these instructions will help you smoothly transition to the latest release without disrupting your service.

From backing up your data to running the upgrade and addressing common pitfalls, this guide covers everything you need to keep your Nextcloud installation up-to-date and running optimally. Let’s get started!

Introduction

Upgrade NextCloud from version 25.0 to 26.0 (in my case download files manually on Ubuntu 22.04 server) is an essential step to protect your data on your self-hosted environment. In this guide, we’ll cover the step-by-step process to safely upgrade your Nextcloud instance, including pre-upgrade checks, performing the upgrade, and post-upgrade tasks.

More information about web update you can finde on the link.

Prerequisites for NextCloud Upgrade

  • Create backup of Database
  • Create backup of data
  • Check what is the current version of the NextCloud
  • Create Snapshot or Backup of Virtual Machine

Preparation for NextCloud Manual Upgrade

1: Stop Web Server (Apache)


# Stop Apache web server
sudo /etc/init.d/apache2 stop

Stopping the Apache web server ensures that no active processes are using Nextcloud files during the manual upgrade. This step is crucial to prevent file conflicts or corruption when replacing the Nextcloud directory.

2: Check Current PHP Version

php -v

PHP 8.1.2-1ubuntu2.14 (cli) (built: Aug 18 2023 11:41:11) (NTS)
Copyright (c) The PHP Group
Zend Engine v4.1.2, Copyright (c) Zend Technologies
    with Zend OPcache v8.1.2-1ubuntu2.14, Copyright (c), by Zend Technologies

In case that you have PHP version less then 8.2 you need to update it to the newer version. Check this link to investigate common PHP issues on NextCloud.

3: Download the NextCloud Version 26.0 in your Home Directory

Download and unzip latest NextCloud Version:

wget https://download.nextcloud.com/server/releases/latest-26.zip
unzip latest-26.zip

4: Backup Current NextCloud Folder and Database

# Navigate to the Nextcloud location on the server  
cd /var/www/  

# Backup the current Nextcloud folder  
mv html /var/www/html_bkp  

# Create a new folder for the upgraded Nextcloud files  
mkdir html  

These commands ensure a backup of your current Nextcloud installation and set up a fresh environment for the upgrade.

ADVERTISEMENT
  • The mv command renames and moves the existing html folder to html_bkp, preserving your current installation as a fallback option.
  • The mkdir command creates an empty html directory to host the new Nextcloud version.
mysqldump -u [username] -p [database_name] > nextcloud_backup.sql

This command creates a backup of your Nextcloud database. Replace [username] with your MySQL username and [database_name] with the name of your Nextcloud database. Backing up the database is crucial to safeguard your data in case anything goes wrong during the upgrade process. The backup file nextcloud_backup.sql can be restored later if needed.

5: Copy NextCloud Version 26 to the HTML Folder

Copy config file and change permissions:

ADVERTISEMENT
# Navigate to the NextCloud 26 location on the server
cd /home/user/NextCloud

# Move all files to the html folder
mv * /var/www/html/

# Move config file from backup to the version html folder
mv /var/www/html_bkp/config/config.php /var/www/html/config/

# Change permissions
sudo chown -R www-data:www-data /var/www/html/

In this step, you set up the new Nextcloud version and ensure it integrates with your existing setup:

  • The mv command transfers the Nextcloud version 26 files to the designated web server directory (/var/www/html/), making them accessible to the Apache server.
  • Restoring the config.php file preserves your current Nextcloud configuration, including database settings and custom configurations.
  • The chown command assigns proper ownership of the Nextcloud files to the www-data user and group, ensuring the web server can access and manage the files correctly.

6: Continue Upgrade Process through the Web Browser

Open a web browser and navigate to your Nextcloud instance URL, such as:

ADVERTISEMENT
http://your-server-ip-address/ 

You should see an upgrade screen prompting you to complete the process. Follow the on-screen instructions to finalize the upgrade.
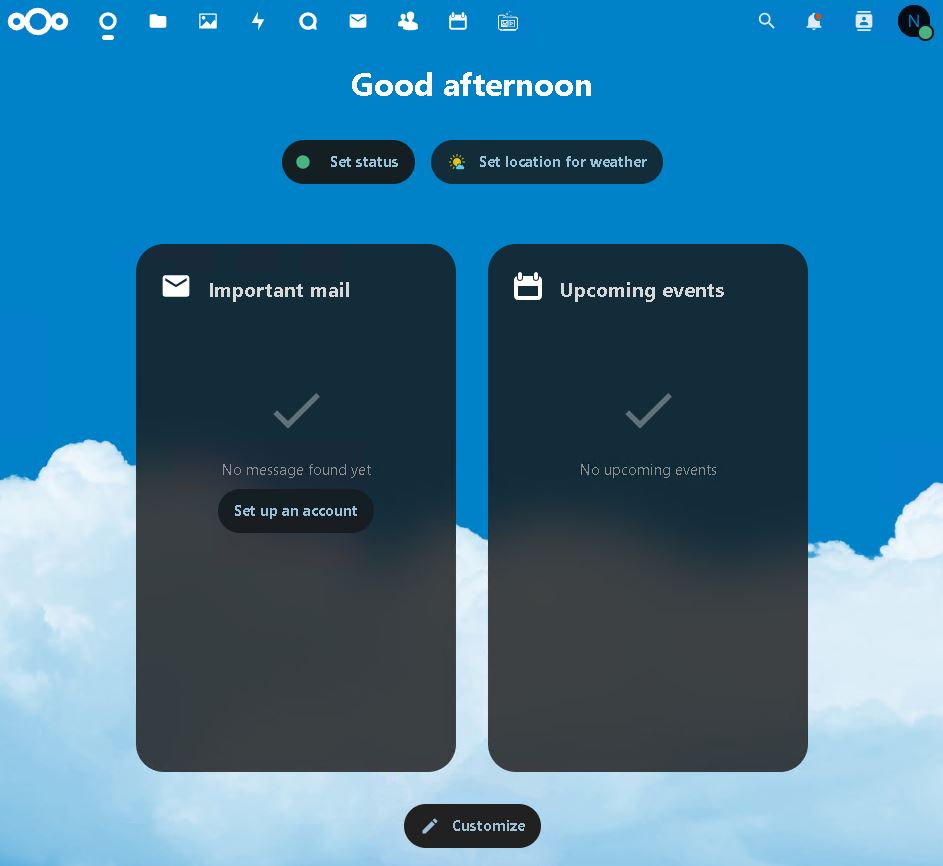
NextCloud dashboard screenshot

About The Author

neo

See author's posts

Tags: nextcloud
ADVERTISEMENT
Previous Post

WordPress: Automatically Website Backup with Bash Script on Linux

Next Post

NextCloud: Port Forwarding – Essential Ports for Smooth Functionality and Remote Access

neo

neo

Next Post
NextCloud: Port Forwarding - Essential Ports for Smooth Functionality

NextCloud: Port Forwarding - Essential Ports for Smooth Functionality and Remote Access

Follow Us

  • Trending
  • Comments
  • Latest
MikroTik: Export Configuration in Text File

MikroTik: Export Configuration in Text File

Fortinet FortiGate: Static Route Configuration via GUI and CLI

Fortinet FortiGate: Static Route Configuration via GUI and CLI

Immich: Installation on Ubuntu 22.04

Immich: Installation on Ubuntu 22.04

Fortinet FortiGate Upgrade Path Tool

Fortinet FortiGate Upgrade Path Tool

NextCloud: Port Forwarding - Essential Ports for Smooth Functionality

NextCloud: Port Forwarding – Essential Ports for Smooth Functionality and Remote Access

Organizing and Managing Photos with Immich: Features I Use

Organizing and Managing Photos with Immich: Features I Use

Install Ubuntu 22.04 on Oracle VM Virtual Box

Install Ubuntu 22.04 on Oracle VM Virtual Box

Linux Directories: cd (Change Directory), pwd (Print Working Directory), mkdir (Make Directory)

Linux Directories: cd (Change Directory), pwd (Print Working Directory), mkdir (Make Directory)

Install WordPress on Raspberry Pi 4 with Docker (Ubuntu 22.04)

Install WordPress on Raspberry Pi 4 with Docker (Ubuntu 22.04)

Install Nextcloud on Raspberry Pi 4 with Docker (Ubuntu 22.04)

Install Nextcloud on Raspberry Pi 4 with Docker (Ubuntu 22.04)

Install Nginx Proxy Manager on Raspberry Pi 4 with Docker (Ubuntu 22.04)

Install Nginx Proxy Manager on Raspberry Pi 4 with Docker (Ubuntu 22.04)

Install Docker on Raspberry Pi 4 with Ubuntu 22.04

Install Docker on Raspberry Pi 4 with Ubuntu 22.04

Recent News

Install WordPress on Raspberry Pi 4 with Docker (Ubuntu 22.04)

Install WordPress on Raspberry Pi 4 with Docker (Ubuntu 22.04)

Install Nextcloud on Raspberry Pi 4 with Docker (Ubuntu 22.04)

Install Nextcloud on Raspberry Pi 4 with Docker (Ubuntu 22.04)

Install Nginx Proxy Manager on Raspberry Pi 4 with Docker (Ubuntu 22.04)

Install Nginx Proxy Manager on Raspberry Pi 4 with Docker (Ubuntu 22.04)

Install Docker on Raspberry Pi 4 with Ubuntu 22.04

Install Docker on Raspberry Pi 4 with Ubuntu 22.04

MikroTik: Check Your Wireless Password

MikroTik: Check Your Wireless Password

ADVERTISEMENT

DefenceDev Tutorials

defencedev Logo

Whether you’re just starting or looking to expand your skills, I hope you find useful information and engaging discussions here. Let me take you through my journey and the goals behind this space!

Follow Us

Browse by Category

  • Blog
  • Cloud
    • Private
  • Linux Tutorials
    • Bash Scripting Tutorials
    • Commands
    • Networking
  • Network Tutorials
    • FortiGate
    • MikroTik
  • Projects
    • AdGuard
    • Immich
    • Nextcloud
    • WordPress
  • Solutions
    • Docker
  • Video Tutorials
    • MikroTik Videos

Recent News

Install WordPress on Raspberry Pi 4 with Docker (Ubuntu 22.04)

Install WordPress on Raspberry Pi 4 with Docker (Ubuntu 22.04)

Install Nextcloud on Raspberry Pi 4 with Docker (Ubuntu 22.04)

Install Nextcloud on Raspberry Pi 4 with Docker (Ubuntu 22.04)

  • Site Map
  • Privacy Policy
  • Facebook Page
  • Disclaimer
  • Contact
  • About Me

© 2025 defencedev.com - All rights reserved.

No Result
View All Result
  • Home
  • Blog
  • Linux Tutorials
    • Bash Scripting Lessons
    • Commands
    • Networking
  • Solutions
    • Docker
  • Network Tutorials
    • FortiGate
    • MikroTik
  • Projects
    • AdGuard
    • Immich
    • Nextcloud
    • WordPress
  • Cloud
  • Video Tutorials
    • YouTube Channel
    • MikroTik Videos

© 2025 defencedev.com - All rights reserved.